Sally Trader's shop is probably the most important shop in the game, for you can sell just about any non-junk item to her. Her shop has always been a good place to gather the items that you'll need for your adventures.
| Item | Cost | Function | Notes |
|---|---|---|---|
| Food | 2 marks | Allows you to feed certain creatures; heals 4 injured guts in and out of battle. | Food is more than worth purchasing if you're just starting out. When used outside of battle, Food heals 4 guts. During battle, Food can be used to feed certain creatures, allowing you to save a quest, gain some experience, and perhaps some charm in return. It is also a lot more cost-effective than a Healing Salve. |
| Fish | 2 marks | Allows you to feed creatures at the Docks; heals 4 injured guts in and out of battle. | Fish isn't worth purchasing if your character isn't strong enough to venture at the Docks, but they can still be useful in that it can be used to heal 4 guts in and out of battle. If you have at least 500,000 marks to spare, Fish can also be used to create Fish Oil at the Dragon Guard. |
| Torch | 5 marks | Allows you to quest at the Mounds and Dungeons if you don't have a weapon with Glow or Flames. | Torches are a necessity to quest at the Mounds and the Dungeons if you don't have a weapon with Glow or Flames, and you probably shouldn't be carrying such weapons at the Mounds because the Worm will try to eat them. Another way of eliminating the use of torches is to either join a clan with the CatsEyes ability or equip a weapon with the CatsEye attribute. |
| Rope | 8 marks | Allows you to quest at the Mountains. | Ropes are a necessity if you're questing at the Mountains and aren't a member of a clan with the HillFolk ability or don't have a weapon with the HillFolk attribute. Buy at least 100 of these, for the Giant Goats will quickly eat up your rope supply. |
| Pen and Paper | 12 marks | Allows you to write and send notes to other players in the game. | This is probably the most useful item out of all the items that are sold in Sally Trader's shop, for you'll be using it throughout the game to write and send notes to other players. Up to 500 writing spaces are allowed for each note; for additional writing space, simply purchase more Pen and Paper. |
| Sleeping Bag | 25 marks | Helps prevent rust when you're camping out. | Sleeping Bags can help reduce rust while you're camping outside, but you'll find that a lot of your items and weapons will still rust. |
| Cooking Gear | 60 marks | Helps prevent rust when you're camping out. | Cooking Gears can help reduce rust while you're camping outside, but you'll find that a lot of your items and weapons will still rust. This is slightly better than a Sleeping Bag. |
| Camp Tent | 120 marks | Helps prevent rust when you're camping out. | Camp Tents can help reduce rust while you're camping outside, but you'll find that a lot of your items and weapons will still rust. It is your best means of reducing rust if you're camping outside. |
| Identify Scroll | 48 marks | Identifies an unidentified weapon in your backpack. | Identify Scrolls cost 48 marks a piece and can be used to identify unidentified weapons in your backpack, but they're seldom useful because it's always cheaper to identify your weapons at Bill Smith's Weapon Shop. You should only purchase these scrolls if you're planning to camp out at the Mountains. If you're going to be questing at the Mountains, be sure to buy some of them at this shop. |
| Healing Salve | 120 marks | Heals 12 injured guts in and out of battle. | For the price of 120 marks, Healing Salves are more expensive than Food and aren't worth purchasing. You're basically paying 10 marks to heal each injured gut, whereas you're only paying 0.5 marks to heal each injured gut if you buy Food or Fish instead. Be sure to pass this one up. |
| Seltzer Water | 160 marks | Cures diseases/status effects in and out of battle. | Seltzer Waters are items that are somewhat worth purchasing if you're going to be questing in the Forest, the Mountains, or in the Mounds. If you're going to be questing at the Mountains, be sure to buy some of them at this shop. |
| Panic Dust | 640 marks | Induces Panic to target creature if successful. | For the cost of 640 marks, Panic Dust is one of the more expensive items that are sold in this shop and probably isn't worth buying. It can only be used during battle, and the target creature will try to run away from you if you're successful. However, if you find yourself in a battle with a stronger creature, there's a good chance that the creature will kill you before you can even use a Panic Dust. |
| Blinding Dust | 320 marks | Blinds target creature if successful. | Blinding Dusts aren't too useful because there aren't many creatures in this game that will use items against you. If successful, Blinding Dust prevents the target creature from being able to use items against you. |
| Blast Powder | 1,600 marks | Inflicts 40 damage to target creature if successful. | Blast Powder is by far the most expensive item in this shop and is rarely worth the cost if you're just starting the game. Although the blast damage of 40 per Blast Powder seems really nice, the amount of skill that your character has will determine whether or not you'll miss and waste your 1,600 marks. |
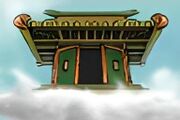
| Castle Permit | 800 marks | Allows you to enter the Castle Area if you're a Peasant. | This used to be the most expensive item in this shop, but because Castle Permits are no longer permanent items that can be used more than once, the cost of the permits has reduced and rightfully so. When you enter the Castle Area, the first Guard will take away your Castle Permit and allow you to enter if you're a Peasant. |